|
|
|
Oliver Rotary Phase Converter
| Neither this site
nor anyone at C.M. Oliver intend for this to be a
handbook or guidance for building a rotary phase
converter. This is only a journal of my process
accompanied with photos. If you would like to build your
own rotary phase converter, please consult you local
electrician or motor repair shop. Continue reading at
your own risk.
|
I have purchased several
machines now that have 3 phase motors. Like many, I can neither
afford to have 3 phase service run to my shop nor pay for it if
it were installed. I have looked around for a rotary phase
converter (RPC) for about a year now and have not found any in
my price range.
February 2006
Well, I finally broke down a purchased a converter. I did not
buy the whole thing though. I found a guy in North Carolina who
buys the parts needed in large quantities and was willing to
build one for me. He put together a converter panel to go with
the Westinghouse 7.5 h.p. motor mentioned below. My end of the
deal was that I had to mount and wire the panel.
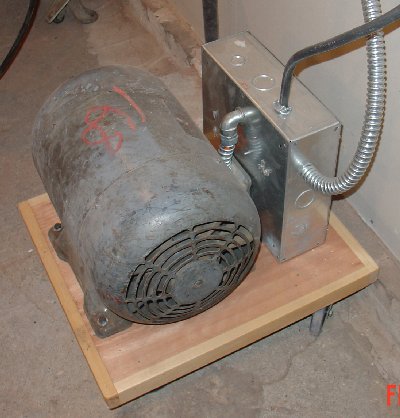
I built a small base out
of two 3/4" thick pieces of scrap plywood sandwiched
together and edged them with some sycamore pieces I had in the
scrap bin. I bought some cheap casters to roll this thing around
a bit when cleaning.
I mounted the motor to the
base first, using some 3/8" lag bolts. Then I mounted the
panel to base using some 1.25" drywall screws. I ran the
motor wires (three of them) into the panel through some flexible
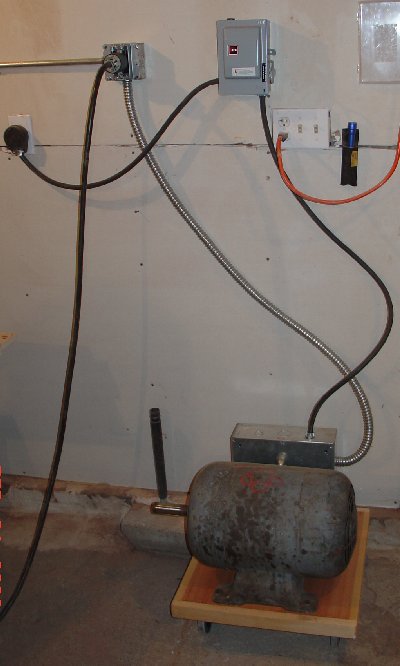
conduit and a hole I had drilled. I then connected all of the
wiring according to the schematic. What this means is I hooked
up the motor wire where I was told to, ran power from a single
phase disconnect and connected them where I was told to, and ran
a wire through flexible conduit out to some 3 phase outlets and
connected them where I was told to.
This all took some time
and a few extra bucks for the wheels, conduit and 10 gauge wire,
but it starts my tools like a dream. I was using a Ronk
Add-A-Phase, a static converter, and it ran my saw ok, but the
RPC starts it in less than half the time and I can run any of my
other machines, smaller h.p. to larger h.p. on the same RPC. The
static converter is set up for only a specific h.p..
I do intend to get some
voltage meters and explore the load balancing techniques that
are talked about on several groups. For now, I'm just happy this
all worked out to be so cheap and useful.
Parts acquired:
| Part Description |
Price |
|
Westinghouse 7.5 h.p. 3 ph. motor
I got this motor with my Fay & Egan jointer, purchased at
auction. I went with a single phase motor for the
jointer, so this motor was surplus to me.
|
$0.00
|
|
Panel with capacitors, etc.
|
$89.00
|
|
25' flexible 3/4" conduit
|
$20.00
|
|
4 - 4" rubber casters
|
$8.00
|
|
25' - 10 gauge copper wire (4 individually insulated and sheathed
wires)
|
$18.00
|
|
2 - 4" boxes
and plates to hold outlets
|
$12.00
|
|
|